Search This Blog

Showing posts with label bread. Show all posts

Monday, November 28, 2011

Onion Rosemary Rolls


Awe, the calm before the storm and time to breath again for a couple of days – three to be exact! 
A new favorite in our house, onion rosemary rolls.  These wonderful bites remind us of our most favorite bread in the world – Morton’s onion bread.  A recipe that has alluded me, although I search and search ((let me know if you have it! Please)) In the meantime, try your bread making skills with this recipe.  I am sure you will be pleased with the results.  Best of all only one rise!
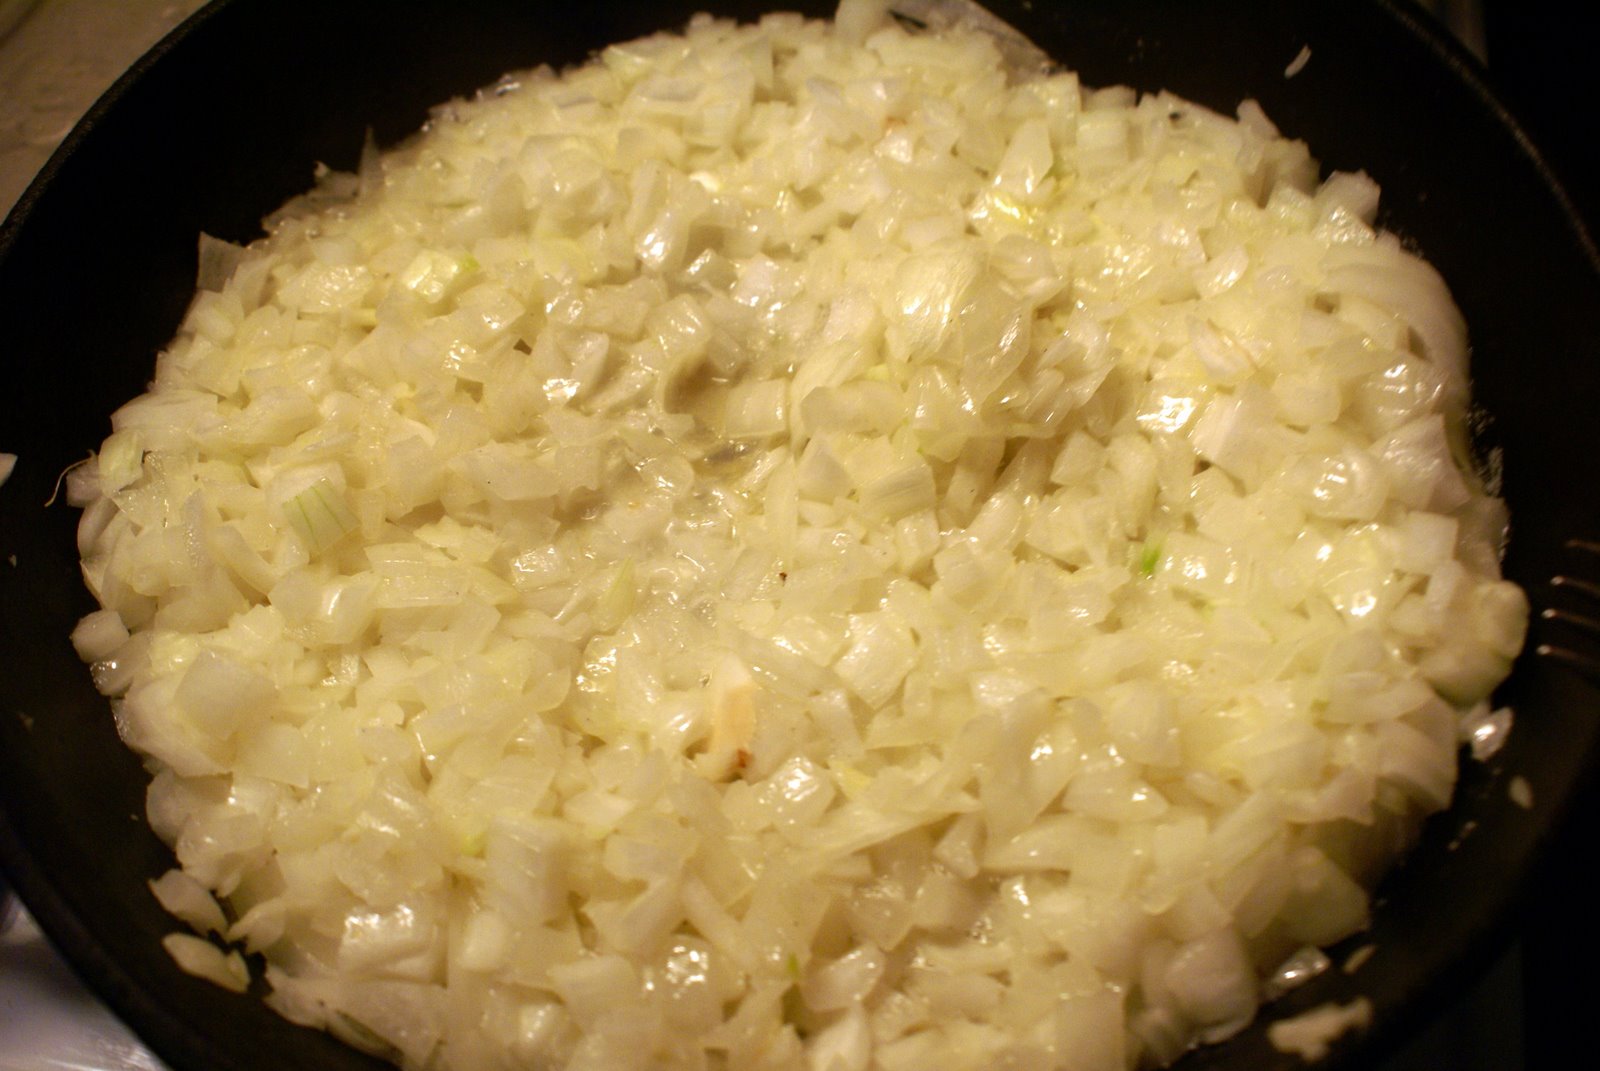


Caramelizing the onions
Both plain yellow onions and sweet onions work


Bubbles happen or throw it out
Always check the temperature of your water


Onion and Rosemary Loaves
From Cathy Thomas
Mellssa’s Everyday Cooking with Organic Produce
adapted

4 T unsalted butter
3 cups chopped yellow onions
2 ¼ t active dry yeast
2 t sugar
1 cup warm water, not over 95 degrees
5 cups all- purpose flour, divided use
1 ½ t sea salt
1 ½ T or more chopped fresh rosemary leaves
olive oil spray
2 T unsalted butter melted and mixed with ¼ t garlic salt

~ medium high heat melt butter in large cast iron skillet
~ add onions and stir occasionally until caramelized about 30 minutes, reduce heat if necessary to prevent burning
~ set aside and cool completely
~ in bowl of electric mixer fitted with paddle add yeast, sugar and water
~ allow yeast to bubble about 15 to 20 minutes
~ add half of the flour, salt and rosemary
~ mix on low
~ add caramelized onions with juices from skillet and a bit of the remaining flour
~ switch to dough hook and knead until smooth with a tiny bit of stickiness
~ add more flour as needed in small amounts
~ dough is ready when it springs back, is still a bit sticky and can form a window pane in the stretch test
~ ((my lazy ways)) tired of cleaning so many bowls I now just pull the dough out of the mixing bowl and spray the bowl with olive oil spray
~ I then form the dough into a large ball and put it back in the bowl rolling around to coat
~ cover with a clean damp cotton dish towel
~ allow to rise 1 hour or until double in size
~ preheat oven 400 with baking stone
~ punch dough down and cut into equal portions and flatten
~ allow to rest 10 minutes
~ shape into little balls
~ put corn meal onto baking stone to prevent sticking
~ place dough balls onto baking stone 2 inches apart
~ bake until golden brown 15 to 25 minutes
~ remove from oven and immediately brush with garlic butter mixture or omit they taste great either way


Saturday, August 6, 2011

Bagels

Hot fresh bagels!!!  I have tried many a bagel recipes and this one is my hands down favorite with a bit of adaptation.  I really need to make these more often since they are so easy.
WARNING: this recipe is not for the faint of heart mixer.  The stiff dough can burn the heck out of the motor.

FYI this recipe has a night time start

I prefer to pop a hole in the middle.  Rolling the dough  is to much work.

Then stick you fingers in the middle and slowly pull outward.

Good night, Bagels ready for a slow cold rise.

Good morning beauties, nice and puffy

A quick boil

Dip into the toppings when still wet and sticky


 agh!  lowest shelf... lowest shelf oops


Bagels
From Cooks Illustrated
The New Best Recipes
  adapted


2 cups all purpose King Arthur Flour
2 cups King Arthur Bread flour
2 t sea salt
1T barley malt syrup
1 1/2t dry active yeast
1 ¼ cups water (80 degrees)
toppings: poppy seeds, sesame seeds, caraway seeds, black caraway seeds, kosher salt…anything your heart desires

~ mix the flours, salt, and barley malt in a bowl of a standing mixer fitted with a dough hook
~ mix a low speed to blend
~ add the yeast and water
~ mix at the lowest speed until dough looks scrappy about 4 minutes
~ increase speed to low-medium and mix until dough comes together and is smooth and stiff about 8 to 10 minutes
~ remove the dough from bowl and put on work surface
~ divide the dough into 8 equal pieces about 4oz each
~ roll each piece into a smooth ball and cover with towel for 5 minutes
~ poke one finger into the center of the ball
~ then stick two fingers into the center hole, stretching the dough into a circle
~ try to get the center hole an inch to an inch and a half while maintaining an equal thickness all the way around.  As you can see I have not perfected this technique
~ place the bagels on baking sheets dusted with corn meal, cover with plastic wrap and proof in the refrigerator overnight, 12-18 hours
~ remove the bagels from the refrigerator 20 minutes before baking
~ in a saucer or two pour your toppings
~ adjust the oven to racks to lower middle and heat to 450
~ if using a baking stone, my preference, sprinkle with corn meal
~ pour water into a large wide lipped stock pot, water should be at least 3 inches in depth and bring to a rapid boil
~ working 3 to 4 at a time drop the raw bagels into the boiling water
~ after 20 seconds flip the bagels and remove after 10-15 seconds
~ transfer to a wired rack bottom side down
~ when cool enough to handle gently press into toppings
~ place in oven and bake until golden brown ( not burned like mine) about 14 minutes
~ use tongs to remove and cool on wire rack

Sunday, June 12, 2011

Corn Tortillas


One of my favorite college food memory, fresh tortillas slathered in butter from a local restaurant. Well with my love of gadgets, I knew I had to have a tortilla press.  

 getting ready to press

flattened and ready to go

dinner is served...Fish Taco's


Corn Tortillas 
from Food and Wine Annual 2009
 Jessamyn Waldman
adapted

2 cups masa harina
1 1/2 cups water 
1T fresh lime juice

~  in a large bowl, combine the masa harina with the water and lime juice stir until moistened
~ on a sheet of plastic wrap, roll the tortilla dough into an 8-inch log and cut the log into 16 pieces
~ roll each piece into a ball, transfer to a large plate and cover loosely with plastic wrap
~ heat a griddle or a comal (a flat, round griddle) until very hot.
~ line a basket or a wide, shallow bowl with a clean kitchen towel
~ cut a sturdy, resealable plastic bag at the seams or cover tortilla with plastic wrap
~ set 1 ball of dough between the sheets of plastic
~ using a tortilla press, a skillet or a rolling pin, flatten the tortilla to a 5-inch round
~ peel off the plastic and set the tortilla on the hot griddle
~ cook the tortilla over high heat until lightly browned in spots, about 1 minute. Flip and cook about 30 seconds longer
~ wrap the cooked tortilla in the towel. Press, cook and wrap the remaining balls of dough, keeping the stack of tortillas covered
~ serve the tortillas warm  

Tuesday, March 29, 2011

Hamburger Buns


There is nothing like a great hamburger.  A little organic beef, salt and pepper the perfect combination as they say keep it simple sweetheart.  I made my pan-seared burgers . But to make the ultimate burger, I needed a great bun.  A few years ago I purchased Bernard Clayton's New Complete Book of Bread.  Previous owned and with the most awesome hand written notations, so I decided to go with his bun recipe.  


Fast easy and wonderful best describes these buns.  The perfect marriage of hamburger and bun.

The Hamburger Bun
from Bernard Clayton's
New Complete Book Of Bread
adapted

5+ cups of bread flour
2 packages of dry yeast

2T margarine
2 cups hot water (120-130 degrees)
3/4T sea salt 

~ mix 2 cups flour and yeast in mixing bowl and stir to blend
~ cut margarine into small pieces and beat in to flour mixture 3 minutes
~ add hot water and beat with flat beater
~ add the salt
~ continue beating until dough is like a smooth batter
~ add 1/2 cup of flour at a time until dough has formed a rough shaggy mass
~ switch to dough hook and knead for 6 to 8 minutes
~ sprinkle a bit of flour if the dough sticks to the sides (do not overload - dough should be a bit wet and form a nice window when finished)
~ place dough in oiled warmed bowl (I used a metal bowl I filled and emptied with hot water)
~ cover with plastic  wrap and put in a warm place (80 to 100 degrees) for 30-40 minutes
~ turn dough out on to a floured surface
~ cut into 10 to 12 pieces
~ shape into balls pulling dough down  to create a smooth top
~ place dough balls on corn meal baking sheet ( I used parchment too)
~ cover with dish towel for 30 minutes or until soft and puffy
~ preheat oven 400 degrees
~ bake 20 minutes or until nicely browned
~ cool on rack

Thursday, March 24, 2011

Irish Soda Bread


Easiest bread ever!  Since yeast is not required.  Taste great and simple, a win win recipe.


Irish Soda Bread
from James Beard
Beard on Bread
adapted

4 cups all purpose flour
1t sea salt
3/4 t baking soda
3/4 t double acting baking powder
1 1/2 to 2 cups buttermilk

~ preheat oven 375
~ combine the dry ingredients and mix to blend
~ add enough buttermilk to make a soft dough (similar to biscuit dough, but firm enough to hold its shape)
~ knead in lightly floured surface for 2 to 3 minutes until smooth and velvety
~ form into a round loaf
~ place on oiled or buttered cookie sheet
~ cut an x on the top
~ bake in preheated oven 35-40 minutes

Sunday, January 30, 2011

Pane Siciliano ~~ Sicilian Bread


To carb or not to carb...we vote carb, in moderation of course.  Homemade eliminates all the words found on labels that no one can pronounce.  Besides playing with dough is fun although, I would like to be rolling in dough (click the ads on the blog...hint hint :-)) 

Don't fear bread making.  All you need are a few tools: timer, kitchen thermometer, kitchen scale and a mixer with a dough hook.  Don't cook the yeast.  Water should be 105 to 115 degrees.  If it doesn't foam, you killed it so just toss it out and start again.  I have murdered more then my share of yeast bits. 

Pane Siciliano // Sicilian Bread
from Carol Field
The Italian Baker

2 1/2t active dry yeast
1/4 cup warm water
1T olive oil
1t malt syrup
1 cup water room temperature
about 2 1/2 cups (350 grams) fine semolina flour
1 cup plus 1T (150 grams) unbleached all purpose flour
3T (10-15 grams) salt
1/3 cup sesame seeds

~ stir yeast into 1 1/4 cups warm water in a large mixing bowl
~ let stand until creamy about 10 minutes
~ stir in oil and malt with the paddle
~ add flour and salt and mix until smooth
~ change to dough hook and knead on medium speed until dough is firm, compact and elastic with lots of body (like playdough) 4 to 5 minutes
~ finish kneading by hand on a lightly floured surface
~ first rise place dough in a lightly oiled bowl, cover tightly with plastic wrap and let rise until double about 1 1/2 hour
~ the dough should be springy and blistered but still soft and velvety
~ shaping and second rise punch the dough down and knead briefly
~ let it rest for 5 minutes
~ flatten it with your forearm into a square
~ roll it into a long, fairly narrow rope, bout 20 to 22 inches long
~ dough should be so elastic that it could almost be swung and stretched like a jump rope
~ cut the dough in half and shape each half into a loaf
~ roll the dough into a 1 1/2 inch thick rope then coil into a figure that looks like an inverted S
~ continue the coiling form each end until ends meet
~ place the loaves on a  parchment paper sprinkled with cornmeal
~ spray loaf with a misting of water and sprinkle with sesame seeds
~ pat seeds down very gently
~ spray plastic wrap with a light coating of vegetable oil spray and cover loaves
~ place a kitchen towel on top of plastic
~ let rise until doubled 1 to 1 1/2 hour
~ heat oven 425 degrees (if using a baking stone turn oven on 30 minutes before baking and sprinkle with cornmeal just before adding loaves)
~ bake 10 minutes and spray 3 times with water
~ reduce oven to 400 degrees and bake 25 to 30 minutes longer
~ cool on rakes

Monday, January 10, 2011

Grissini Torinesi "Breadsticks from Turin"


Most of these did not make it to the table as you can see in the sparse picture above.  These beauties are what breadsticks should taste like and only take a little over 90 minutes to make. Fun to make especially when you whip the sticks into shape.

foamy yeast
smells great

first and only rise
cutting works better if you have a perfect square; however, mine are never perfect...oh well...

cuttings before shaping
I use a pasty cutter

fresh out of the oven
my shaping is not the best and my sticks tend to look like bones

Grissini Torinesi "Breadsticks from Turin"
from Carol Field
The Italian Baker

1 3/4t dry active yeast
1T malt syrup (see amazon link below if you have no idea what this is)
1 1/4 cup warm water (95 - 105 degrees)
2T olive oil plus a bit more for brushing dough
3 3/4 (500g) unbleached all purpose flour
1 1/2t (8 grams) salt
semolina for sprinking

~ put warm water and yeast in mixing bowl
~ oil a Tablespoon measuring spoon and use it to get malt syrup (this makes this sticky syrup drop off of the spoon)
~ add the malt syrup to water and yeast and stir gently to combine
~ let sit about 10 minutes until yeast foams
~ mix in oil with paddle
~ add flour,and salt
~ mix until dough comes together
~ switch to dough hook and knead at low speed about 3 minutes
~ remove from bowl and knead briefly by hand
~ pat the dough into a 14" by 14" square
~ place on a well floured surface
~ lightly brush the top with oil and cover with plastic wrap
~ let rise until doubled about an hour
~ preheat oven 400
~ sprinkle the dough with semolina flour before cutting
~ cut the dough crosswise into 4 equal sections
~ cut each section crosswise again into 5 equal strips (about as fat as a finger)
~ pick up a piece and grasp it with your fingers and stretch to the length of your baking sheet (we bounce it as we pull...it's a family event)
~ place on baking sheet
~ bake 15 to 20 minutes until browned
~ cool on rack

Friday, December 31, 2010

Buttermilk Biscuits

Just say "NO" to the Pop In Fresh Boy.  Fresh biscuits from scratch in less than 30 minutes with little clean up...what could be better?

use a pastry cutter 
mixture needs to stay cool
do not over mix
mix until it resembles a coarse corn meal

improvise when necessary
all of my round cutters are for doughnuts so I employed this little cup to cut

yum...yum..yum

Buttermilk Biscuits
from Maria Helm Sinskey's
The Vineyard Kitchen
adapted

2 cups all purpose flour
1T sugar
1T baking powder
8T (one stick) unsalted butter cut into chunks
1 cup buttermilk
2T unsalted butter melted

~ place one oven rack on top rung and one on bottom rung
~ preheat oven 450
~ line baking sheet with parchment paper
~ whisk to combined dry ingredients in mixing bowl
~ add cold butter and cut into dry ingredients with pastry cutter until the mixture resembles coarse corn meal
~ add buttermilk and bring dough together (do not over mix)
~ turn out dough on a lightly floured surface and knead a couple times
~ pat dough into 1 inch thick round
~ cut with 2 inch round cutter
~ transfer biscuits to baking sheet 1 1/2 inch apart
~ bush tops with melted butter
~ bake on top rack 8-10 minutes turning pan once midway (watch tops for browning)
~ place sheet on bottom rack for 2-3 minutes to slightly brown bottoms

Sunday, November 21, 2010

Zucchini Bread....YUM!

Not the best picture, but I can attest to the moist yet crunchy scrumptiousness of this bread.  Some blogs have the most beautiful pictures.  Me, eh I point and shoot and move on. 


One of my favorite books.  My first bread book...my inspiration.  Not really just easy to follow recipes with no fuss and good taste.  This zucchini bread recipe is an all time favorite.  Something in it caramelizes so it has a slight crunch to it, yummm.

 soak the eggs in hot water to bring them to room temperature


Carl Gohs' Zucchini Bread
from Beard on Bread
adapted

3 eggs
2 cups granulated sugar
1 cup safflower oil
2 cups grated raw organic zucchini
3t vanilla extract
3 cup of all purpose flour
1t salt
1t baking soda
1/4 t double acting baking powder
3t ground cinnamon
1  cup toasted broken up walnuts (unsalted raw)

~ preheat oven 350
~ beat eggs until light and foamy
~ add the sugar, oil, zucchini and vanilla and mix lightly but well
~ combine the flour, salt, soda, baking powder and cinnamon and add to egg zucchini mixture
~ stir until well blended 
~ add nuts
~ pour into two 9x5x3 loaf pans
~ bake 1 hour

Saturday, November 20, 2010

Jason's Quick Coccodrillo Ciabatta Bread


I found this recipe on The Fresh Loaf.  A fabulous bread baking web site.  I prefer the recipe with semolina; however, this loaf contains only bread flour.  As I peered into my container of semolina flour, I noticed a strange web like formation.  Hmmm, I thought very strange.  I poured it out only to find wormy things, ach!  Disgusting!  I just purchased the semolina from Henry's Markets bulk bins.  Beware of the bulk bins.  Yeech, kind of makes my stomach turn.  I guess I could have used it and given the kids a little extra protein...

I bake all of my breads in my barbecue lined with all of my broken pizza stones for several reasons.  It does not heat up my house.  It reaches high temperatures fast, 500 degrees.  I can create steam without reducing heat.  My dream, wish, desire a wood burning oven and I have a copy of the plans from Sunset Magazine. Someday....


 climbing dough


 Steam hole...most people attach a rotisserie here.  I find it the perfect place to spray water.

Jason's Quick Coccodrillo Ciabatta Bread
from The Fresh Loaf web site
slightly adapted

Variaton 1
500g bread flour
475g (~2 cups) water
2 tsp. yeast
15g salt

Varation 2 (Semolina)
350g bread flour
150g semolina flour
475-485g (~2cups) water
2tsp. yeast
15g salt

  1. In Kitchen Aid style mixer: Mix all ingredients roughly till combined with paddle, let it rest for 10 minutes.
  2. With the paddle (I prefer the hook to prevent the dough from crawling into the guts of the mixer), beat the living hell out of the batter, it will start out like pancake batter but in anywhere from 10 to 30 minutes it will set up and work like a very sticky dough. if it starts climbing too soon, then switch to the hook. You'll know it's done when it separates from the side of the bowl and starts to climb up your hook/paddle and just coming off the bottom of the bowl. I mean this literally about the climbing, i once didn't pay attention and it climbed up my paddle into the greasy inner workings of the mixer. It was not pretty! Anyway, it will definitely pass the windowpane test.
  3. Place into a well oiled container and let it triple! it must triple! For me this takes about 2.5 hours
  4. Empty on to a floured counter (scrape if you must, however you gotta get the gloop out), cut into 3 or 4 peices. Spray with oil and dust with lots of flour. Let them proof for about 45 minutes, which gives you enough time to crank that oven up to 500F. Barbecue takes about 10 minutes to reach 500F.
  5. After 45 minutes or so the loaves should be puffy and wobbly, now it's iron fist, velvet glove time. Pick up and stretch into your final ciabatta shape (~10" oblong rectangle) and flip them upside down (this redistributes the bubbles, so you get even bubbles throughout), and onto a baking sheet with parchment paper dusted with corn meal. Try to do it in one motion and be gentle, it might look like you've ruined them completely, but the oven spring is immense on these things.
  6. Bake at 500F until they are 205F in the center (about 10 minutes)
Related Posts Plugin for WordPress, Blogger...