Search This Blog

Wednesday, July 6, 2011

Fresh Apricot Gelato

Finally catching up...  I made this gelato in the beginning of June when we had fresh apricots.  Now the tree is bare due to the fierce winds the tree endured all spring.  We are sad since usually our tree runeths over and we eat them, dry them and bake with them.  Sadly we just ate and made frozen treats with them this year.  We have next year to look forward too. 

oh those wonderful apricots

blended smooth

 
mmmm gelato....

 
Apricot Gelato
base from Ciao Bella Book of Gelato & Sorbetto
 
base
2 cups organic whole milk
1 cup organic heavy cream
4 large organic egg yolks
2/3 cup sugar

~ in a heavy bottom sauce pan combine milk and cream
~ place over medium-low heat
~ stir occasionally until temperature reaches 170 degrees  and tiny bubbles start to form
~ meanwhile put egg yolks in a round medium size pyrex and whisk until smooth
~ add sugar to yolks and whisk until thick and pale
~ IMPORTANT PART
~ temper your egg yolks by taking about 1/2 cup of hot milk/cream mixture and slowly pour into yolks while whisking yolks...keep it moving or you will end up with scrambled eggs
~ continue adding about 1/2 cup at a time slowly until you have added about 1 1/2 to 2 cups
~ pour egg mixture into remaining milk/cream mixture in pan
~ cook over low heat stirring frequently until mixture reaches 185 degrees (do not boil)
~ pour mixture through a fine mesh strainer back into pyrex
~ cool and place in refrigerator at least 4 hours or overnight


Apricot Gelato

enough apricots to fill your blender
1 recipe of base

~ puree apricots in blender
~ add base and blend together
~ cool mixture in refrigerator about an hour
~ add to ice cream maker and make according to instructions

flavors to enhance apricots: rosemary, honey, vanilla, cinnamon, cardamom, tarragon and ginger

Apple Pie


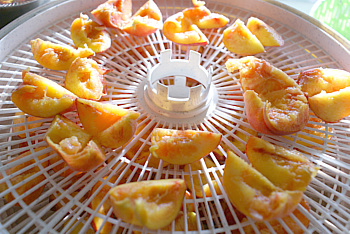
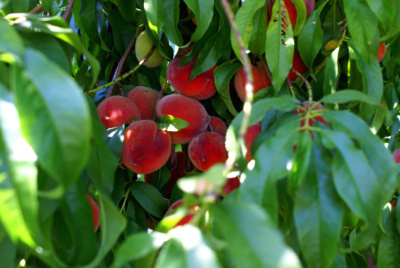
Since my apple tree is bursting with apples, I finally took the plunge and made apple pie.  What fun and so easy!  I am expanding my apple appreciation and making turnovers today.  I am just wondering...if the apples are in a pie form do they count towards the 80% of diet from fruit and vegetables?  Because we are working hard to achieve that goal with a bit of wiggle room.  Martha Stewart provided the recipe; however, as you can see the pictures are all mine.  Ah I strive for such perfection...not really...don't have the time.

coarse crumb

super stupendous apples

the most awesome apple peeler from Bed Bath and Beyond

oven ready... bit too much wash, oh well

da da!!! not the most beautiful pie but I can attest to the greatness of it

Classic Apple Pie
from Martha Stewart
Baking Handbook
adapted
Pate Brisee
2 1/2 cups all-purpose flour
1  teaspoons salt
2 sticks// 1 cup unsalted butter, cut into small pieces
1/4 cup ice water
Directions
~ place flour and salt in a food processor; process to combine
~ add butter, and process until mixture resembles coarse meal, about 10 seconds
~  with machine running add ice water in a slow, steady stream through the feed tube with the machine running, just until the dough holds together
~ do not process for more than 30 seconds.
~ test dough by squeezing a small amount together; if it is still crumbly, add a bit more water
~ turn dough out onto a piece of plastic wrap
~ press into a flattened circle, and wrap in the plastic
~ refrigerate for at least 1 hour before using
3 tablespoons all-purpose flour, plus more for work surface

Classic Apple Pie
1 Pate Brisee
1 large egg yolk
1 tablespoon heavy cream
3 pounds assorted apples, such as Macoun, Granny Smith, cortland, Jonagold, or empire, peeled, cored, and cut into 1/4-inch-thick slices
2 tablespoons freshly squeezed lemon juice
1/4 cup granulated sugar
2 teaspoon ground cinnamon
1/2 teaspoon ground nutmeg
1/8 teaspoon sea salt
1 tablespoon unsalted butter, cut into small pieces
Sanding sugar, for sprinkling

~ on a lightly floured work surface, roll out one pate brisee disc into a 13-inch round about 1/8 inch thick
~ fit dough into a 9-inch pie plate
 ~ with a sharp paring knife, trim dough flush with the rim
~ roll out remaining 2 discs of pate brisee to about 1/8 inch thick
~ place on a parchment-lined baking sheet, and chill until firm, at least 30 minutes
~ preheat oven to 400 degrees
~ in a small bowl, whisk together egg yolk and heavy cream; set aside
~ in a large bowl, toss the apples with the lemon juice, granulated sugar, flour, cinnamon, ~ nutmeg, and salt
~ remove pie shell from refrigerator and fill with apple mixture
~ dot with butter
~ brush the rim with egg wash
~ place second piece of dough on top and gently press over the apples
~ gently press the top and bottom together
~ using kitchen scissors , trim the top piece of dough to a 1-inch overhang all around
~ tuck dough under and crimp edge as desired
~ brush the top and pie edge with the reserved egg wash, and sprinkle generously with sanding sugar
~ cut three vents into top 
~ freeze or refrigerate until firm, at least 30 minutes
~ place pie plate on a baking sheet, and bake until crust just begins to brown, about 20 minutes.
~ reduce oven temperature to 350 degrees and continue baking until crust is golden brown and juices are bubbling, 35 to 45 minutes
 ~ if the crust begins to get too dark, drape a piece of aluminum foil over the top
~ transfer to a wire rack to cool

while baking sit back and watch the movie Waitress
and
devise unique pies to thrill your audience

Monday, July 4, 2011

Happy 4th of JuLy


a few weeks ago the eggs hatched and were where the happy home of a lot of 
Monarch Caterpillars.

Back from a little jaunt to Los Angeles - traffic, ugh.
Return to blogging tomorrow, ah.
Busy today making healthy food since my doctor informed me 80% of our food should come from fruits and vegetables, so I started the day making Juan Canary Melon two ways with freshly picked figs and with fresh lavender and lemon.  Followed by roasted banana ice cream, spicy yellow split peas, hearty chicken curry with potatoes, braised lima beans, vegetables and brown rice and green beans with carrots.  I was a machine.

Thursday, June 23, 2011

Coffee Gelato buzz buzz new and improved

I am so happy because I am the new owner of a Lello Simac Il Gelato maker circa 1980's or 90's.  A powerhouse!  So now the request come in daily, "we want...gelato or sorbet".  So I need to catch up and add the apricot gelato, apricot sorbet and the new and improved vanilla gelato to the blog.  Coming up next the return of pistachio gelato.  Time to go through the huge stack of ice cream, sorbet and gelato cookbooks I just picked up from the library for more inspiration.
Warning do not eat at night, unless you have late night plans.

Coffee  Gelato
 Base Recipe from The Ciao Bella Book of Gelato & Sorbetto
F.W. Pearce & Danilo Zecchin
 adapted
makes about 1 quart 

2 cups organic whole milk
1 cup organic heavy cream
1 1/2T or more finely ground espresso coffee beans
1/2 t vanilla paste
4 large organic egg yolks
2/3 cup sugar

~ in a heavy bottom sauce pan combine milk, cream, 1T ground coffee beans and 1/2t vanilla paste
~ place over medium-low heat
~ stir occasionally until temperature reaches 170 degrees  and tiny bubbles start to form
~ meanwhile put egg yolks in a round medium size pyrex and whisk until smooth
~ add sugar to yolks and whisk until thick and pale
~ IMPORTANT PART
~ temper your egg yolks by taking about 1/2 cup of hot milk/cream mixture and slowly pour into yolks while whisking yolks...keep it moving or you will end up with scrambled eggs
~ continue adding about 1/2 cup at a time slowly until you have added about 1 1/2 to 2 cups
~ pour egg mixture into remaining milk/cream mixture in pan
~ cook over low heat stirring frequently until mixture reaches 185 degrees (do not boil)
~ pour mixture through a fine mesh strainer back into pyrex
~ add remaining ground coffee beans
~ cool and place in refrigerator at least 4 hours or overnight
~ pour into ice cream maker and use as directed
~ eat it right away or for more developed flavors freeze for 2 hours

Amazingly Wonderful!!

Sunday, June 19, 2011

Home Made Cheese Filled Tortellini Tortelli di Erbette

So many pictures and so little time...lost between the dance recital and the bridge construction I finally unearthed these tortellini's.  My youngest helped out and became a pasta master and eater.

 step one: make the pasta dough - best way in your food processor
 step two: divide the dough into four equal parts

 step three: flatten dough and roll on #1 in pasta maker

 step four: fold rolled dough and repeat steps three and four about four times
step five: roll dough on numbers 2 through 5 one time each 
cover dough with damp dish towel until ready to cut

 step six: sprinkle dough with flour

 step seven: dip cutter into flour and cut

 step eight: make filling

 step nine: plop in filling (I always tend to over fill)

 step ten: fold over and press to seal

 step eleven: fold around finger and pull down top like a cape


Tortelli di Erbette
Pasta Filled with Ricotta and Swiss Chard
from Carol Field
Celebrating Italy

Pasta
2 1/2 cups (350 grams) unbleached all purpose flour
pinch of salt
4 large eggs
a little cold water

~ set the four and salt in the bowl with the steel blade and pulse several times
~ with the motor running pour the eggs down the feed tube
~ mix only until the dough has come together loosely around the blade
~ if the dough is too stiff, add a little cold water
~ remove and kneed on a lightly floured surface
~ gather dough in a ball and cover with plastic wrap and let rest 15-30 minutes

Filling
2 bunches of swiss chard
3/4 pound fresh whole milk ricotta (whirled in a food processor)
1 cup freshly grated parmesan cheese
1/4 cup unsalted butter at room temperature
1 egg
large pinch of freshly grated nutmeg
salt and freshly ground pepper to taste

~ trim chard removing thick stems and wash leaves very well
~ put the chard leaves in pot using only the water that remains on the leaves
~ cook until tender 5-9 minutes
~ drain and squeeze out
~ chop fine
~ mix the chard, ricotta, parmesan, butter, egg, nutmeg, salt and pepper
~ cool before use
~ can be refrigerated 4 to 8 hours

Making the tortellini

~ roll out the pasta
~ using a pasta machine
~ take a piece of dough about the size of an egg and roll up through the first setting
~ follow directions above in pictures
~ cook tortellini in a large pot of boiling water add 1T salt to water
~ cook 3-5 minutes

from our garden -  Swiss Chard

Friday, June 17, 2011

blind ambition part two: caramel apples


So there we were in Costco when we spied a most unique sampling, caramel apples!  Coated with Oreos - birthday party coming up, I can do that!


After all my apple trees are bursting with apples.

What a mess!

I read a trick to getting the caramel to stick is sand paper.  Well of course my sand paper got displaced in all of the birthday paraphernalia and my caramel dripped and had a hard to sticking but eventually did.  Difficulty hit me at every juncture.  I purchased craft sticks and crammed them in the apples only to find the stick in my hand and the apple floating around in the caramel so I dug out some bamboo skewers, ah success.  I copied the recipe from  Your Homebase Mom and her apples are perfection, mine not so much; however, they did taste most wonderful.

Caramel Apples
from Your Homebased Mom Blog
http://www.yourhomebasedmom.com/trick-or-treat-top-tips-for-making-caramel-apples/
for great detail visit her blog


2 C brown sugar
1 C corn syrup
1/2 C butter
1 can sweetened condensed milk

~ combine the first 3 ingredients
~ after butter is melted stir in the milk
~ cook to soft ball (230degrees).
~ stir constantly.
~ stir in  1 tsp vanilla.
~ remove from heat
~ dip apples into the caramel, then roll in nuts if desired
~ let set up on a cookie sheet
~ place in refrigerator if needed
~ after completely cooled you can drizzle with chocolate and cover with toppings

Suggested toppings:  sprinkles, crushed Oreos, mini M & M’s, mini chocolate chips, chopped nuts, crushed candy bars.


from our garden: apples

Wednesday, June 15, 2011

blind ambition part one: hand dipped drumsticks


Another birthday party and of course we must break the cupcake trend and tickle the young pallets with a cool treat.  I plowed through my cookbooks and came up empty handed and resorted to the internet.  I found my pot of gold on  Baking Bites blog.


I still remember my first cone in Europe, so different then the American version.  The chocolate inner coating and plug delighted me.  How ingenious!


So I come up with these wacky ideas and truly think I can throw them together quickly and they will be easier then the tradition cake.  After all don't they do just that on all of the cooking shows?  However, what we do not see are all the people behind the scenes prepping. Ummm, something to do over the summer make my kids sous chefs and dish washers.  I will buy them fancy aprons and dish washing gloves.

Fun, yum, fantastic...I would like to make the outer shell thinner and had some difficulty getting the chocolate to stick after the first dozen (add more butter to the chocolate).  I made three dozen.  The biggest feat was making room in my freezer (junky french door refrig.).

Hand Dipped Drumsticks
from Baking Bites
adapted

1/2 gallon ice cream (any flavor), slightly softened
8 sugar cones
1 1/4 cups semisweet/dark chocolate chips (trader joes are great!)
5+ tbsp unsalted butter
1/4 cup finely chopped roasted/salted peanuts, almonds, nerds, sprinkles........any thing your heart desires

~ melt about 1/4 cup of chips in microwave working in 30 second increments
~ using a mini tiny whisk plop a chunk in the bottom of the cone and swirl chocolate around inner cone (see most fabulous picture)
~ use a butter knife to fill each of the cones with ice cream, then top off with a rounded scoop of ice cream ~ ~ place each ice cream cone in the freezer as you finish, either placing them inside the narrow glasses (or other stand) to hold them upright or laying them on the parchment-lined baking sheet
~ freeze for at least 3 hours.
~ melt the remaining chocolate chips with 3 tbsp of butter in the microwave, working in 30 second increments
~ choose a small bowl because it makes dipping easier
~ stir in remaining butter
~ chocolate should be smooth and relatively thin
~ working with one ice cream cone at a time, dip the frozen ice cream scoops in chocolate, rotate to coat quickly dip chocolate into topping
~ return to freezer
~ chill at least 1-2 hours before serving
~ store in airtight bags.


 everyone loved them 
Happy Birthday B

Sunday, June 12, 2011

Corn Tortillas


One of my favorite college food memory, fresh tortillas slathered in butter from a local restaurant. Well with my love of gadgets, I knew I had to have a tortilla press.  

 getting ready to press

flattened and ready to go

dinner is served...Fish Taco's


Corn Tortillas 
from Food and Wine Annual 2009
 Jessamyn Waldman
adapted

2 cups masa harina
1 1/2 cups water 
1T fresh lime juice

~  in a large bowl, combine the masa harina with the water and lime juice stir until moistened
~ on a sheet of plastic wrap, roll the tortilla dough into an 8-inch log and cut the log into 16 pieces
~ roll each piece into a ball, transfer to a large plate and cover loosely with plastic wrap
~ heat a griddle or a comal (a flat, round griddle) until very hot.
~ line a basket or a wide, shallow bowl with a clean kitchen towel
~ cut a sturdy, resealable plastic bag at the seams or cover tortilla with plastic wrap
~ set 1 ball of dough between the sheets of plastic
~ using a tortilla press, a skillet or a rolling pin, flatten the tortilla to a 5-inch round
~ peel off the plastic and set the tortilla on the hot griddle
~ cook the tortilla over high heat until lightly browned in spots, about 1 minute. Flip and cook about 30 seconds longer
~ wrap the cooked tortilla in the towel. Press, cook and wrap the remaining balls of dough, keeping the stack of tortillas covered
~ serve the tortillas warm  

Corn on the Cob via Pressure Cooker


Perfect corn in 3 minutes! Thanks to my most wonderful pressure cooker.  Simply fabulous crunchy yet yielding moist kernels of perfection. If you don't have a pressure cooker yet, get one.  I have a Fagor Duo and it's clearly the best.


Corn on the Cob
cooked with a pressure cooker

~ undress corn by removing husk and silk
~ add water to pressure cooker about an inch
~ place steamer basket in pressure cooker
~ add corn to pressure cooker
~ lock on lid and bring to high pressure
~ maintain high pressure for 3 minutes
~ quick release steam
~ remove and enjoy

Soba Noodle Salad with Thai Green Curry Sauce

 How do they do it?  Those other blogs with their perfectly styled pictures.  I once read one blogger spent hours arranging their pictures.  I can do that.  I just need to set my alarm for 3am, after all who needs sleep?  Me!  Food stylist not a future career for me.  At our house, we eat with our mouths and I remind them daily just how lucky they are to have such terrific food.  They nod in agreement and tell stories of poor eating experiences around town.  I enjoy their school lunch descriptions; something they will not let pass their lips.  How we wish for Revolution Food school food service.  We were lucky enough to participate in a lunch tasting over a year ago and my kids are still talking about just how wonderful the food was.  They service California, Colorado or the Washington D.C. metropolitan area schools.  Perhaps your school is able to breakaway from the bureaucracy of the school districts food service strangle hold and your kids can have real food.  Click on the link above and check out this wonderful program.

As salad month winds down, the foolery begins.  If the main ingredient is noodles can it still be called salad?

Soba Noodle Salad with Thai Green Curry Sauce
from Dale Gartland
Food and Wine Annual Cookbook 2010
adapted

1 tablespoon vegetable oil
1 tablespoon green Thai curry paste (beware very spicy)
One 14-ounce can chopped tomatoes—drained and chopped, juices reserved
3/4 cup chicken stock or low-sodium broth
1 can unsweetened coconut milk
2 tablespoons dark brown sugar
1 tablespoon fresh lime juice
1 teaspoon Asian fish sauce
3 baby bok choy—stems thinly sliced, leaves coarsely chopped
6 ounces soba noodles
1 tablespoon toasted sesame seeds
1/2 cup roasted cashews  
1 scallion, thinly sliced 

~ bring a large saucepan of salted water to a boil
~ in a medium saucepan, heat the vegetable oil
~ add the red curry paste and cook over moderately high heat, stirring, until fragrant, about 30 seconds
~ add the tomatoes and their juices and boil over moderately high heat until reduced to 3/4 cup, about 4 minutes
~ add the chicken stock, coconut milk and brown sugar and simmer over moderate heat, stirring occasionally, until reduced to 1 1/2 cups, about 7 minutes
~ remove from the heat and stir in the lime juice and fish sauce.
~ line a plate with paper towels
~ add the bok choy stems and leaves to the boiling water and cook until crisp-tender, about 1 minute
~ using a slotted spoon, transfer the bok choy to the paper towels and pat dry
~ add the soba to the boiling water and cook, stirring occasionally, until al dente
~ drain the soba and rinse in a colander under cold water
~ let stand for 5 minutes, tossing occasionally, until dry
~ transfer the soba to a large bowl
~ add the  sesame seeds, 1 cup of the red curry sauce and all but 1/2 cup of the bok choy leaves and toss well
~ arrange the soba salad in shallow bowls and drizzle with the remaining sauce
~ garnish with the cashews, scallion and the remaining bok choy and serve

Thursday, June 9, 2011

Home Grown Tomatoes

three types of tomatoes

If you purchase your tomatoes at the grocery store you may never know the goodness of this fruit.  Tomatoes are one of the easiest things to grow.  My favorite so far this year is the small round cherry.  So sweet with a crunch when you bite through the skin.  Several of my plants sprouted from tomatoes gone bad and tossed in my garden.  In fact, today I noticed one just plant growing through my asian pear tree and it was almost 6 feet tall.  About half of my plants this year are in pots as a experiment to see if they would remain free of those nasty tomato horn worms.  So far, only one very large one found that I picked off and disposed of in the trash can.  I read that some squish them but I don't have the stomach for that, yeeeccchhh!

Grab a pot and grow a tomato plant

Wednesday, June 8, 2011

Elizabeth's Chicken Salad


Another wind storm and the peaches are gone from the front yard.  Lucky for us more are ripening in the backyard. For this great summer salad, I replaced the grapes and added freshly picked peaches.  A fabulous switch.

During the past week I have tried out a variety of organic chicken and have been less then impressed.  I am back to Empire Kosher organic chicken - worth every penny.  Best of all it doesn't have the funky bits shoved in it.  Ugh!  I hate having to dive into the carcass to pull out the inners.

Elizabeth's Chicken Salad
from The Fiddlehead Cookbook
adapted

Poached Chicken
1 1/2 cups water
1/2 cup dry white wine
1 sweet onion quartered
2 organic carrots cut into 2 inch pieces
1 organic celery rib cut into 2 inch pieces
1/2 lemon
5 parsley springs
1 garlic clove lightly crushed
1/4t black peppercorns
4 springs fresh thyme
2 large whole kosher organic chicken breasts

~ place all ingredients but chicken in pot over high heat
~ place chicken on top of vegetables
~ when liquid comes to a boil reduce heat to low and cover
~ simmer gently until meat is cooed through 15 to 20 minutes
~ remove chicken from the pot and allow to cool
~ you can toss the stock or strain and save for another use
~ cut chicken into 1/2 cubes
~ cover and refrigerate until ready to make salad

Chicken Salad
4 cups cubed chicken
4T extra virgin olive oil
4T raspberry vinegar
2T low fat sour cream
2t dijon mustard
4 freshly picked peaches or organic peaches
1/2 to 3/4 cup toasted chopped walnuts
sea salt and black pepper to taste
3 cups shredded romaine lettuce

~ in a large mixing bowl add chicken
~ whisk olive oil, vinegar, sour cream and mustard in a small bowl
~ add to the chicken and mix 
~ add salt and pepper to taste
~ plate 1/2 cup lettuce per plate
~ top with chicken mixture
~ sprinkle nuts and arrange peaches

from our garden: peaches, thyme, parsley, lemon

Monday, June 6, 2011

Dehydrated Peaches


A day of rest and catching up after two weeks of non-stopping fun filled, exhausting, kid fueled activities...aahhh.  Stepping back prior to the craziness, I had my moment of zen in the form of dried peaches.


Our cup (bowl) runith over unfortunately, they don't just pop open into perfect halves like apricots.  So the juice ran down my hands, swirled around my arms and sprayed my counter.  Next time I will device a better way.


 Another helpful hint I forgotten, cut everything the same size.  Impossible!  I am not that persnickety.  Although it makes timing that much easier, oh well live life and don't let odd sized peaches muddle your day.

Dehydrated Peaches

peaches
4 cups of water with the juice of one lemon squeezed into it

~ pit and cut peaches into equal size portions (is that even possible?)
~ place peaches into water solution - this is suppose to stop discoloration (works ok and is easy enough)
~ drain peaches
~ place on drier leaving space for air flow
~ dry in dehydrator on dried fruit setting (120-140 degrees)
~ should take 6-20 hours (mine took 18 hours)

storage: I place mine in a freezer zip lock bag in the freeze.  I should have used my plastic bag air sucking device (brain fart can't remember name...that is what kids do to you), but I was too too lazy and the easy way is just fine.

Friday, May 27, 2011

Free download Martha Stewart - Summer Grilling Cookbook 2011

We love FREE!

Martha Stewart Living Radio is offering free download of her grilling cookbook 


Enjoy the holiday weekend and raise a flag for those who bravely served our country
THANK YOU!


~~Get ready for grilling season with recipes from top barbecue and grilling authorities with the Martha Stewart Living Radio Grilling Hotline Cookbook.

Download Now: Free Grilling Cookbook

Monday, May 23, 2011

Firecracker Wings Pressure Cooked and Baked


I am in trouble, I think.  My kids prefer Mom's cooking to going out.  My husband was out of town so I ask them,  "what do you want for dinner?"  Hoping for anything that does not involve a load of dishes and expecting the reply, "let's go out" or some frozen concoction from Trader Joe's.  But oh no, no rest for the wicked.  "We want firecracker wings, corn on the cob and artichokes," they shout out.  After a load of lip smacking and napkins, three messy faces smiled and said, "make again".


Firecracker Wings
from Sunny Anderson and Me


2 jalapeno peppers
1/4 cup soy sauce
1/4 cup honey
1/4 cup brown sugar
2 teaspoons cayenne pepper
2 teaspoons allspice
5 teaspoons fresh thyme
3 teaspoon ground ginger
4 garlic cloves, chopped
5 chives, chopped
1/4 cup apple cider vinegar
1/4 cup lime juice
1/4 cup orange juice
7 lbs chicken wings and legs
honey
2t non modified corn starch 


~ put first 13 ingredients in  blender
~ put all of the chicken in a large zip lock bag and add marinate
~ marinate in the refrigerator 4 hours
~ pour marinate and chicken into pressure cooker
~ cook 6 minutes high pressure
~ natural release about 10 minutes
~ remove chicken and put on parchment paper lined baking sheet
~ preheat oven 450 degrees
~ add corn starch to marinate and whisk
~ whisk over high heat until marinate reduces and thickens
~ squeeze a small amount of honey on each piece of chicken
~ pour marinate over each piece of chicken
~ bake 15 minutes

Sunday, May 22, 2011

I need to start a garden blog

I adore my garden.  First thing every morning I walk my front and backyard.  Nature is the purest form - relaxation.  Seeing and hearing bees buzzing, humming birds stalking (yes, they follow me around), yellow and red birds collecting seeds, night owl wooing, Monarch butterflies and caterpillars, lizards and the all time favorite roadrunner along with the occasional squirrel, racoons, rat (my nemesis), snake, rabbit, doves...brings me joy.  So, I share with you my delightful little space on this earth.

Step into my garden...

this is my smiling dragon fly
who let me walk up to
and 
flew up and down
striking a new pose for the camera each time

the stalker
at least one of the stalkers
these funny humming birds follow us around 
 often closely sitting and observing our every move
apricots are my favorite fruit
we planted this tree 12 years ago
lovely*amazing* wonderful* plentiful
the melon
we are not quite sure what kind of melon
until this melon appeared 
I thought it was a cucumber plant
pomegranates
we are semi successful here
last year leaf hoppers attacked
so this year we are on the look-out
we started with one plant 
and 
the lazy little eaters
didn't throw away the left-overs
they just threw them in the planters
and
now we have many pomegranate bushes
last year I hit the seed bank in Petaluma Ca
and 
I was intrigued 
cardoon
Gobbo Di Nizzia
sunflowers
our favorite to look at
peaches
abundant for about three weeks
before the heat
birds get the top half
of the tree
we enjoy the lower half
share
figs
why? 
the most under appreciated fruit
happy tree as you can see
fruit fruit and more fruit
aloe and cauliflower
two types of aloe
healing
purple cauliflower
colorful
black raspberries
every year I search
for new berry plants
for our zone 9
leeks
grow staples
save seeds

One of the greatest gifts I have given to my children - appreciate and respect of nature
and my husband too
Related Posts Plugin for WordPress, Blogger...